This post is based on actual events. If you’re like most people with a new website, you probably have a shiny new blog. You’ve heard about how great blogging can be for business. There is promise of writing content that brings in people from search engines and social media websites. The thought of writing a great blog post and having people write comments and interact with you is enticing. The only issue is…you have no idea how to format a blog post.  You may have no experience at all when it comes to writing a blog post let alone formatting it in a content management system (your web designer will probably call this a “CMS” and you’ll nod your head like you know what they’re talking about). The reason this is important is because your customers will be reading your blog posts. You want to have clean posts that are easy to read and comprehend.
A post that is not formatted correctly will confuse readers and they might simply move on to another website. Blogging can be very rewarding, but to avoid some basic headaches, here are a few basics for blog post formatting.
How to Format a Blog Post
If you’ve ever published a blog post and turned the entire page into a jumbled mess of different fonts and sizes of text then this post is for you. It’s happened to the best of us. It’s nothing to be ashamed of or angry about. It’s just cause to learn the basics of how to format a blog post.
Copy and Paste is Bad
This is a big mistake I see with newbie bloggers. New bloggers will write their post in their desktop word processor (ex: Microsoft Word) and copy and paste the contents from the document into the content field for their blog. Hit “Publish” and you’re ready to go, right? Wrong. In almost all instances, you can not copy and paste from a word processor into a text field in a content management system. This is true for most blogs and most content areas on any website. WordPress realized that some (quite a few actually) bloggers prefer writing their posts in Microsoft Word so they have a place where you can copy and paste from Word. The icon looks like this: 
If you are looking to copy and paste from Word and you use WordPress on your site then you can feel free to use this application. It will save some headaches when formatting your blog post.
Visual vs. HTML
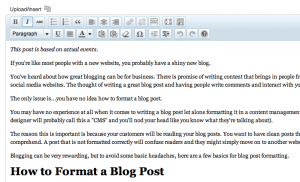
Most content management systems will have a visual editor and an HTML editor. The visual editor allows you to view what your post will kind of look like before you publish it for the publish to see. Another term you might hear regarding the visual editor is WYSIWYG, which stands for What You See Is What You Get. With the visual editor you have the ability to create a blog post much like you would with a word processor. You can use bold and italic. You can use bullets and numbers. You can quote certain portions of your post. You can also use headings.
The visual editor is really slick for the beginning blogger. Even experienced bloggers use it all the time.
The other option is the HTML version, which is important to know as well. The HTML editor might seem scary at first. Most of us, myself included, assume that HTML is some foreign language that only web designers and developers understand. While that is true to some extent, HTML is actually something bloggers need to understand as well.
You won’t have to understand enough of HTML to code an entire website, but you should know enough to craft a blog post that is appealing to your target audience. This requires just basic knowledge of HTML. When you write your blog post in the visual editor you can switch over to the HTML version. This will show you the “code” that creates the visual post you see on the site. This tells the computers and the servers what the post is in their language. A few basic HTML structures are:
- Bold = <strong>Bold</strong>
- Italic = <em>Italic</em>
- A link to a website = A link to a <a href=”https://sarahlynndesign.com.com>website</a>
There are more, but these are a few of the most basic. It’s good to understand how HTML works because you can double check your work in HTML format to see where errors are occurring in the code before publishing.
How to Format a Basic Blog Post
My preferable method for reading and writing blog posts is to use headings and sections. I like to have the option to scan posts by looking at the title, the headings and sections, and any images included in the post. I like making a decision with just a few key points of the post to determine if it’s worth more of my time to read the detail. Blog posts written in this format will have a headline followed by an introductory paragraph. Then there will be a heading tag (H1) followed by another section of important material. Then there will be subsequent sections marked by more headings (H2). There might even be more sections (H3) that follow. I’ve found this style to work well, but it’s not necessarily the only way to do it.
You can also create posts that have only the title and then long paragraphs that tell a story. I read these posts all the time including one I read on How one man escaped from a North Korean prison camp. That post has no headings. It is intimidating to the casual reader, but the story is so compelling that it doesn’t really matter how it’s formatted. Experiment with a few different formats. Copy the formats of your favorite blogs and see if they work. Find what your audience responds to the best and continue using it.
Summary
For readers, there is nothing more frustrating than a blog post that is not formatted correctly. Having fonts that are out of whack is hard on the eyes and makes people want to leave a web page immediately. It’s important to make sure you understand the basics of blog formatting so you can create great blog posts that people can actually read. Use these takeaways when you write your next blog post:
- Copy and Paste is Bad
- Visual vs. HTML
- Formatting Blog Posts
Hopefully your next post looks wonderful.
About the Author: Dayne Shuda
Dayne Shuda is a content strategist and blogger. He is the founder of Ghost Blog Writers. Website: http://www.dayneshuda.com Twitter: @DayneShuda


